3D Modelling
- ajmakesthings

- Feb 3, 2020
- 4 min read

I have experience with modelling in Blender. Last year I created the above scene with Sid - I modelled everything, and Sid added shaders, particle systems and rendering. I haven't used Blender since it's update to version 2.8, however, and needed to relearn a couple new things.
However, my footing was pretty solid when I started out creating environmental models.
I will not be documenting every model I make, but have broken down my design-thinking into the different environmental sections, and have recounted the general techniques I use to make each model.
Coastal Town
Sid and I started off by following a speed-model video.
This house was created in Maya, a different 3D modelling software to the one we use. That said, we were less looking for a tutorial and more looking for inspiration on how to give a house character, which this house definitely had, whilst a little too gothic for our game. Basing our first house off of this model helped us think creatively about how to make a house model.


The above pictures show the result. The shingles on the roof had to be created individually at first and then duplicated and rearranged to look like each one was made from scratch, but that was the most time-consuming part of the process. By scaling down the bottom face of the house, it gave the house a quirky, off-kilter look. The same effect was achieved by creating loop cuts on the roof and scaling inwards along the Y axis. Instead of a straight, triangular roof, it looks like its bowing a little, like it's been lived in and has worn down over time. The beams on the outer corners and the cross-sections of the house look classic and organic, and we really loved the homely, cottage style for the coastal town.
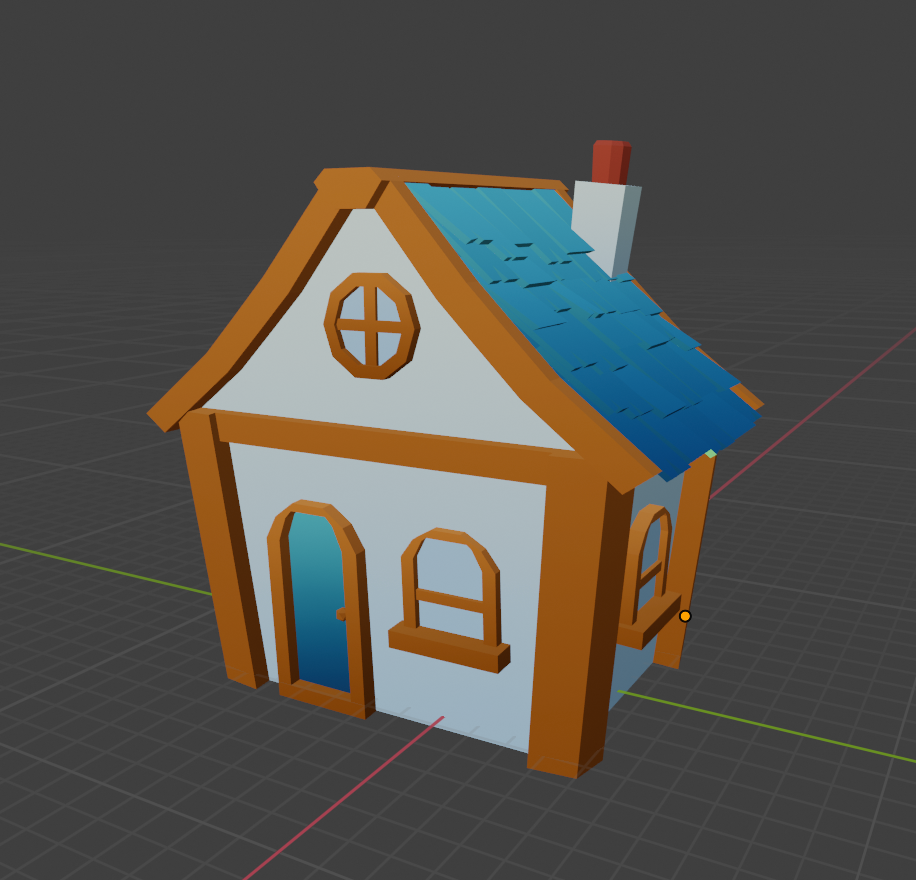
We kept my model, and I textured it (see Gradient Texturing section below), and thought it would be a good idea to make the house modular, so it could be edited and have its colour and shape changed so not all models looked the same. For this reason, I kept windows, doors and chimneys as separate objects so they could be duplicated and moved into whatever position we wanted.
I created an add-on that could be positioned whichever preferred was as well, which really helped to give houses an individual appearance, but they all had a consistent style.


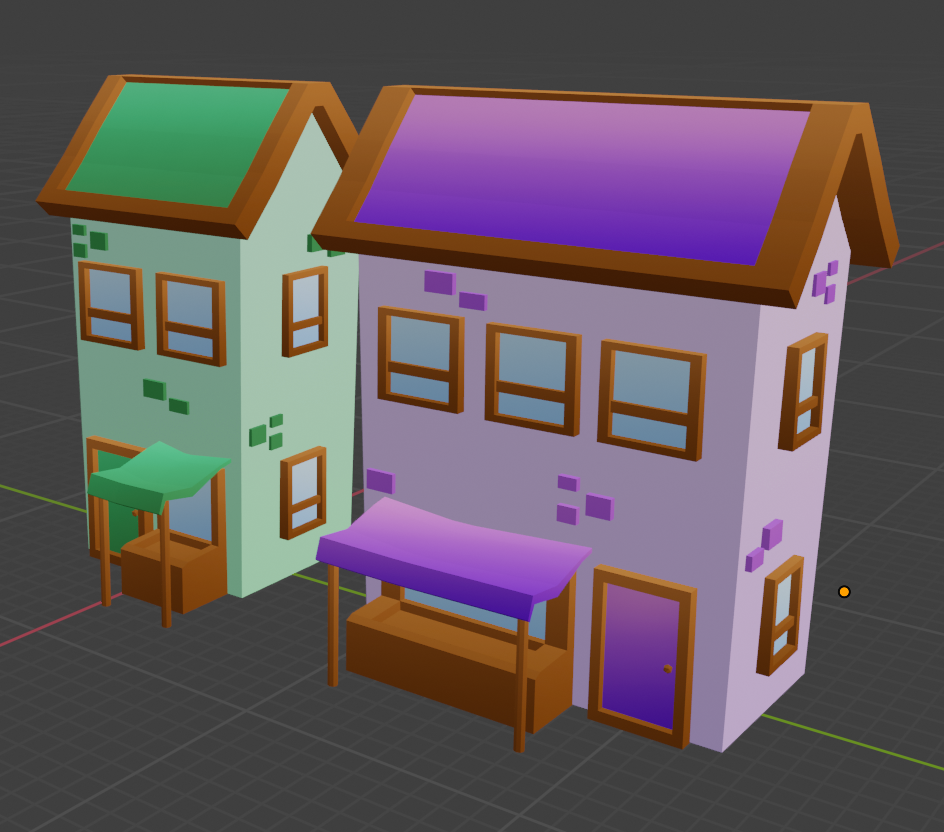
On our asset list for the coastal town there is also need for shop fronts, and so, to practise my modelling skills, I made these from scratch in a different way. They were tall, with more of a town-house look, made of stone, and I made market stalls to prop up against their front windows to identify them as businesses.
In the moment, I was happy with these models, however when I went back to them the next day, I realised how static and square they looked, absolutely lacking the personality of the first batch of houses. Lines were too sharp and harsh, and I knew that I needed to re-do them.
Before re-making them, however, I was sent a video of someone who made a fairy house out of glass bottles.
This little house had such personality, and felt like it could be Maive's house. So I decided to re-create it in Blender, hoping that in doing so I could learn some new techniques that helped me inject some creativity into our models.
The process of making it was long and arduous, and we won't be making something like this for Maive, however the boost of creativity it gave me was welcome. Rounding the edges of windows and extruding the tops of doors made it look jaunty and homely, and the rounded buildings are something we may want to use for later areas.


Having done this experiment, I re-made the shop fronts, with thicker wooden borders and rounded windows. Even the little stones peppering the walls had their edges bevelled. I was extremely pleased with the result.


After doing these, I decided to remake the original cottage, using the new doors and windows and adding some stones to the cladding. The main shape stayed the same, but I gave the chimney a little more flavour. Everything is still a separate object, and can be adjusted to create a whole new house with the same look.
Gradient Texturing
Sid has outlined the process we went through for gradient texturing on his blog, however I wanted to include some of my own observations about this technique as I have since been using it more than Sid.

The first thing to note is that quick technique we're using where we project an object from view, which projects the vertices of the object from the angle that you are working from in Blender. This can be adjusted, but my initial understanding of this was that you had to project the whole model - separate objects and all - from one angle in order for the gradient to work. This isn't true, and any vertex, regardless of what it's attached to, can be selected and projected from view at any time during the process. When working with extreme gradients that need to be specifically placed on a particular part of an object, this is an extremely helpful thing to know.

For example, when making the barrels, I wanted the metal gradient to sit vertically from dark to light on the metal bands around the wood. Had I just projected from any angle, I wouldn't have been able to achieve this. Instead I projected from the angle that would result in seeing the bands as front-on as possible.


Comments